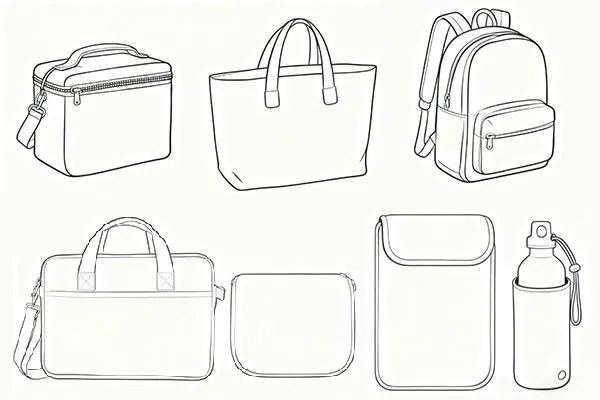
Custom neoprene bags have become increasingly popular for their combination of durability, flexibility, and style. These bags are ideal for personal use, corporate branding, promotional giveaways, and specialized applications such as carrying electronics or gym gear. One of the main advantages of a custom neoprene bag is that it can be tailored to meet specific design, size, and functional requirements, making it a versatile and practical accessory. Understanding the step-by-step process behind creating these bags provides insight into how customization and quality are achieved.
A Custom Neoprene Bag is not just a standard product—it is a carefully designed accessory created to match the user’s needs and preferences. The production process involves multiple stages, including material selection, design, cutting, assembly, finishing, and quality control. Each step ensures that the final product is durable, functional, and visually appealing, while also accommodating branding or personalization requirements.
Step 1: Material Selection
The first step in creating a custom neoprene bag is selecting the right material. Neoprene comes in different thicknesses, textures, and densities, each suitable for different types of bags and uses. For instance, thinner neoprene is ideal for lightweight laptop sleeves or tote bags, while thicker neoprene may be preferred for gym bags or insulated lunch bags that require added protection.
In addition to the neoprene itself, other materials such as zippers, linings, handles, and straps are chosen to complement the bag’s functionality and durability. The right combination of materials ensures that the bag is strong, flexible, and able to withstand regular use without compromising its shape or appearance.
Step 2: Designing the Bag
Once the materials are selected, the design process begins. This stage involves creating sketches, technical drawings, or digital mockups of the bag. Designers determine the bag’s size, shape, compartments, handles, closures, and any additional features such as padded sections or pockets.
Customization options such as color, branding, logos, and patterns are also incorporated into the design. This is a critical step, as it ensures that the bag meets both functional requirements and aesthetic preferences. The design is finalized after multiple reviews to confirm that it aligns with the client’s specifications and intended use.
Step 3: Cutting the Neoprene
After the design is approved, the neoprene material is cut into specific shapes and sizes according to the template. Precision is essential during this step to ensure that all parts of the bag fit together accurately. Advanced cutting methods such as die-cutting or laser-cutting are often used to achieve clean edges and consistent dimensions, especially for large production runs.
Accurate cutting prevents material waste and ensures that the assembly process proceeds smoothly. It also contributes to the overall quality of the final product by maintaining uniformity across multiple bags.
Step 4: Assembly and Stitching
The next step is assembling the bag components. This involves joining the cut neoprene pieces together using specialized stitching, heat sealing, or gluing techniques. Neoprene requires precise methods to ensure that seams are strong and flexible without compromising the material’s natural stretch.
During assembly, additional elements such as zippers, handles, straps, and padding are incorporated. Reinforced stitching and carefully applied adhesives enhance durability, ensuring that the bag can handle daily use and maintain its shape over time.
Step 5: Adding Branding and Custom Features
After the bag’s basic structure is assembled, customization features are added. Logos, patterns, slogans, or personalized text can be applied using methods such as screen printing, embroidery, or heat transfer. These branding elements are positioned according to the design plan, ensuring visibility and alignment.
Custom compartments, pockets, or internal organizers may also be installed at this stage, making the bag highly functional for specific purposes such as carrying electronics, fitness gear, or personal items.
Step 6: Quality Control and Finishing
The final stage in the process is quality control and finishing. Each custom neoprene bag is carefully inspected for stitching accuracy, material integrity, branding alignment, and overall appearance. Any imperfections are corrected, and the bag is cleaned, trimmed, and packaged for delivery.
High-quality finishing ensures that the bag is not only durable but also visually appealing and ready for immediate use. This step is particularly important for branded or promotional items, as the product reflects the company’s image and attention to detail.
Conclusion
Creating a custom neoprene bag involves a meticulous process that combines material selection, thoughtful design, precise cutting, careful assembly, and quality control. Each step contributes to a final product that is durable, functional, and visually appealing, while also accommodating branding and personalization needs. From selecting the right neoprene thickness to adding logos and finishing touches, every stage ensures that the bag meets the highest standards of quality. By understanding this step-by-step process, businesses and individuals can appreciate the craftsmanship behind custom neoprene bags and the reasons why they are a practical, stylish, and versatile choice for everyday use or promotional purposes.